Imagine the rich, creamy delight of homemade ice cream, perfectly tailored to your taste buds. Now, imagine achieving that blissful treat without needing a bulky, specialized ice cream maker taking up precious counter space. Sound like a dream? It's not! We're here to reveal the ultimate secret to creating unbelievably delicious ice cream without a machine, using just three simple ingredients.
For years, the idea of homemade ice cream seemed inextricably linked to expensive gadgets and complicated processes. But what if we told you that the creamiest, dreamiest scoop is well within your reach, requiring nothing more than a whisk (or an electric mixer), a bowl, and a handful of common pantry staples? This article will guide you through the simplest and most popular no-churn method, perfect for satisfying those sudden frozen cravings or impressing guests with minimal effort.
The Secret to Effortless Homemade Ice Cream: No Machine Needed!
The quest for making ice cream without a machine is a common one, and for good reason. Not everyone has the budget or storage space for an ice cream maker, yet the desire for that fresh, homemade taste is universal. The good news is that advancements in no-churn techniques have made it incredibly accessible.
At the heart of many no-churn recipes lies a clever combination of ingredients that, when whipped and frozen, replicate the texture traditionally achieved through churning. The process is simple: whip heavy cream to incorporate air, then fold it into a sweetened, stable base. This aeration, combined with the properties of specific ingredients, prevents the formation of large ice crystals that can make homemade ice cream gritty or icy. Instead, you get a consistently smooth, rich, and utterly luxurious dessert.
While there are several clever ways to create homemade ice cream without a machine – from the "bag-and-salt" method (a fun science experiment!) to the periodic stirring technique – the 3-ingredient approach is undeniably the easiest and arguably the most foolproof for achieving a consistently velvety texture. It's the method that truly delivers on the promise of ultra-creamy ice cream with no machine needed!
Unveiling the Magic Trio: Your 3 Essential Ingredients
The beauty of this recipe lies in its elegant simplicity. You genuinely need only three core components to create a fantastic base for virtually any flavor of ice cream imaginable. Each ingredient plays a crucial role in achieving that coveted creamy texture and delicious flavor.
1. Heavy Cream (or Heavy Whipping Cream)
This is the workhorse of our no-churn recipe. Heavy cream, with its high-fat content (typically 36% or more), is essential for two primary reasons:
- Aeration: When whipped, heavy cream traps air, creating a light, airy, and voluminous base. This incorporated air is what gives ice cream its delightful mouthfeel and prevents it from becoming a solid block of ice.
- Richness & Texture: The fat in heavy cream contributes significantly to the ice cream's luxurious richness and smooth texture. It helps coat the tongue and ensures a satisfying, melty experience.
For best results, ensure your heavy cream is well-chilled before whipping.
2. Sweetened Condensed Milk
Often hailed as the secret weapon in no-churn recipes, sweetened condensed milk is more than just a sweetener. It's a game-changer for texture:
- Sweetness: As the name suggests, it provides all the necessary sweetness for your ice cream, eliminating the need for granulated sugar.
- Creaminess & Anti-Crystallization: This thick, sugary milk product has a unique consistency that helps inhibit the formation of large, gritty ice crystals during freezing. The high sugar content lowers the freezing point, contributing to a softer, more scoopable ice cream straight from the freezer. It also adds a wonderful depth of flavor and lusciousness.
Using a chilled can of sweetened condensed milk will help it incorporate more smoothly into the whipped cream.
3. Your Desired Flavorings or Mix-ins
This is where the fun begins and your creativity shines! While vanilla extract is the classic "third ingredient" for a timeless vanilla ice cream, the possibilities are truly endless. We'll dive into a myriad of flavor ideas shortly, but for now, understand that this element allows you to customize your homemade treat to perfection. Whether it's pure vanilla, cocoa powder, fruit purees, or chopped cookies, this third component transforms your base into a personalized delight.
Your Step-by-Step Guide to Perfect 3-Ingredient No-Churn Ice Cream
Ready to make magic? Here’s how to whip up your own batch of delightful ice cream without a machine:
- Whip the Heavy Cream:
Pour 2 cups of very cold heavy cream into a large mixing bowl. Using an electric hand mixer or a stand mixer with the whisk attachment (you can also do it by hand, but be prepared for an arm workout!), beat the cream on medium-high speed until stiff peaks form. This means that when you lift the whisk, the cream holds its shape firmly. Be careful not to over-whip, as it can turn grainy.
Pro Tip: For even faster whipping, chill your mixing bowl and whisk attachment in the freezer for 10-15 minutes before starting.
- Gently Fold in Sweetened Condensed Milk:
Slowly pour one chilled 14-ounce can of sweetened condensed milk into the whipped cream. Using a spatula, gently fold the condensed milk into the whipped cream. The key here is to fold, not stir vigorously, to maintain as much of that lovely air you just whipped into the cream as possible. Continue folding until the mixture is fully combined and no streaks of condensed milk remain.
- Incorporate Your Flavorings:
Now is the time to add your desired third ingredient! For classic vanilla, stir in 1-2 teaspoons of good quality vanilla extract. If you're adding other flavorings or mix-ins (see ideas below), gently fold them into the base until evenly distributed.
- Freeze to Perfection:
Transfer the ice cream mixture into an airtight freezer-safe container. A loaf pan covered tightly with plastic wrap and foil works wonderfully, as do specialized ice cream containers. Smooth the top with a spatula. Place the container in the freezer for at least 6-8 hours, or preferably overnight, until it's firm enough to scoop.
That’s it! In just a few simple steps, you've created incredible ice cream without a machine, ready to be enjoyed.
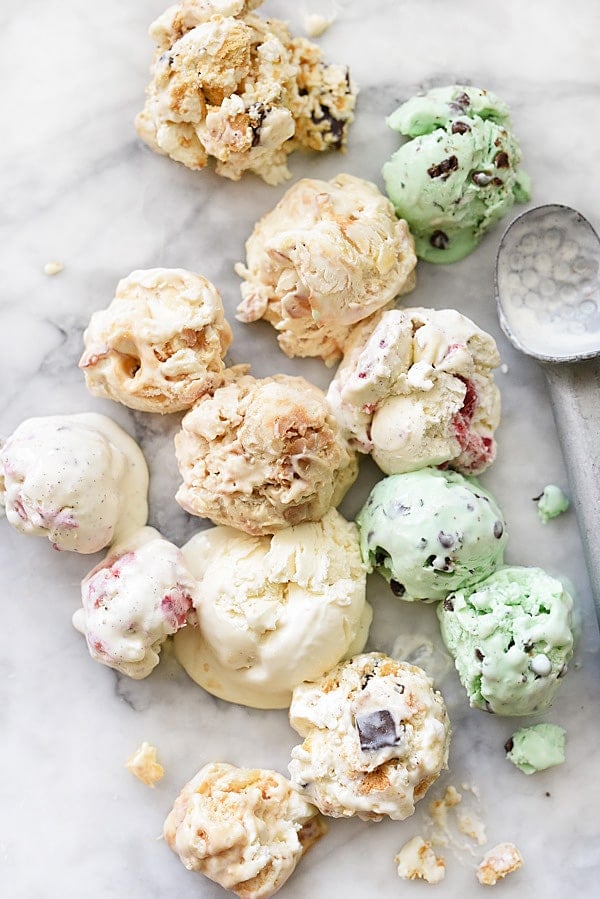
Endless Flavor Possibilities: Get Creative with Your No-Churn Masterpiece
The basic 3-ingredient formula is a blank canvas for culinary creativity. Here are some inspiring ideas to elevate your homemade ice cream without a machine:
Classic & Comforting
- Vanilla Bean: Add a vanilla bean, scraped, along with the extract for intense flavor and beautiful flecks.
- Chocolate: Fold in 1/2 cup unsweetened cocoa powder (sifted to prevent lumps) or 1/2 cup melted and cooled chocolate. Swirl in chocolate fudge sauce.
- Coffee: Dissolve 2 tablespoons of instant espresso powder or strong instant coffee in 2 tablespoons of hot water, then cool before folding in.
Fruity & Fresh
- Strawberry Swirl: Puree 1 cup of fresh strawberries with a tablespoon of sugar, then gently swirl into the base before freezing.
- Lemon Raspberry: Add lemon zest to the base, then swirl in a tart raspberry puree.
- Mango Tango: Fold in 1 cup of ripe mango puree for a tropical twist.
Decadent & Indulgent
- Cookies & Cream: Crush 10-12 Oreo cookies and fold them into the base.
- Peanut Butter Cup: Swirl in peanut butter and chopped peanut butter cups.
- Caramel Swirl: Drizzle in homemade or store-bought caramel sauce before freezing.
- Nutty Delights: Fold in chopped pecans, walnuts, or toasted almonds.
Adult-Friendly (with caution!)
- Boozy Bliss: A tablespoon or two of liqueur (like Kahlúa, amaretto, or rum) can add depth. Be careful not to add too much, as alcohol lowers the freezing point and can prevent the ice cream from fully firming up.
Remember, the best approach is to experiment! Taste your base mixture before freezing and adjust flavorings as needed. For mix-ins, about 1 cup is a good starting point, but feel free to add more or less to your preference.
Pro Tips for Your Best No-Churn Ice Cream Without a Machine
Achieving truly spectacular results with your 3-ingredient no-churn ice cream recipe is easier with a few insider tricks:
- Keep it Cold: Always start with very cold heavy cream. Chilling your mixing bowl and whisk can also significantly speed up the whipping process and help the cream hold its peaks better.
- Don't Overmix: While you want stiff peaks from your heavy cream, over-whipping can lead to a grainy texture. Stop as soon as the peaks hold their shape.
- Fold Gently: When combining the whipped cream with the sweetened condensed milk and any mix-ins, use a gentle folding motion with a spatula. This preserves the air in the whipped cream, which is crucial for a light, airy texture.
- Airtight is Key: Store your ice cream in an airtight container to prevent freezer burn and keep it tasting fresh. Press a piece of plastic wrap directly onto the surface of the ice cream before covering with a lid for extra protection.
- Patience, Please: While the process is quick, the freezing time is essential. Allow at least 6-8 hours for your ice cream to fully set and achieve the right texture. Overnight is even better.
- Soften Before Serving: For the easiest scooping and best texture, let your homemade ice cream sit at room temperature for 5-10 minutes before serving.
While this 3-ingredient method is our favorite for its ease and consistent results, there are other creative ways to make ice cream without a machine. If you're curious about exploring more techniques, you might enjoy learning about methods like the "bag-and-salt" shake or periodic stirring, which are also fantastic options for making ice cream without a machine, each offering a unique experience.
Who knew that creating delicious, rich, and customizable ice cream at home could be this simple? By harnessing the power of just three core ingredients and a little bit of mixing, you can satisfy your deepest ice cream cravings anytime, without needing any special equipment. This easy 3-ingredient no-churn ice cream recipe is a game-changer, opening up a world of creamy possibilities right in your own kitchen. So go ahead, whip up a batch, get creative with your flavors, and enjoy the pure delight of your very own homemade ice cream – no machine required!
